Day 1
Young's Country Definitive - Blackcherry
I thought this would be a good starting point as I have no experience of making wine, the added ingredients are minimal and the results are relatively quick for an impatient first timer!
This kit gives you 6 bottles of Blackcherry Wine at the end of 3 - 4 weeks, perfect!
I started by reading the instructions carefully, obvious you may think, however after spending 5 minutes just looking for the instructions only to find small print stating 'instructions on reverse of label ' . . . duh!
I'm lucky to have access to all the equipment I'll need at work but wanted to use all the same equipment that one would find in a 6 Bottle Wine Making Equipment Kit for authenticity.
Sterilising all the equipment was straight forward and the instructions were clear. However, I did find that further on in the process I needed another container sterilized to dissolve the sugar. If I'd have read the instructions thoroughly in the first place I would have realized this . . . probably :o) So now I have learned that after you have finished sterilizing your equipment, do not throw the remaining solution away, you never know when you'll need it that day.
I found the overall instructions easy to follow with the minimum of fuss. I liked making this first batch of wine in a wine fermenting bucket as it had 1litre graduation marks for ease of measuring, a temperature strip and was transparent to enable you to see what was going on. It was also easy to add ingredients and give a good stir with no mess. Thus far it has my vote, but I suppose I don't have anything to compare it to :o)
After following the instructions carefully, all the processes were followed to the letter, my wine brew was now ready, lid on with air lock bubbler.
So what about temperature to optimize fermentation? My works' kitchen is quite warm so I put the fermentation bucket in there and it stayed at a steady 22°c, lovely!
.jpg) |
| Day 1 - Blackcherry |
I was really excited to get into work to see how my Young's Country Definitive Blackcherry Wine was coming along.
To be honest there wasn't that much activity in the air lock bubbler, however on viewing through the fermentation bucket I could see that it was starting to ferment slowly . . . even to my untrained eye :o) I checked the temperature and it was still around 22c as before.
 |
| Day 2 - Fermentation well under way |
I had to leave it to it's own devices over the weekend but look forward to what it's going to look like on Monday morning when I need to add some tepid water . . .apparently .
Day 5
Days 3 and 4 are missing as my wine was locked away in my works' Kitchen over the week end. This was a shame as I was meant to add some tepid water to the bucket on Day 3, but alas had to wait until Day 5 :o(
On inspection my Blackcherry Wine (Must) was still bubbling away gently and the lid of the fermentation bucket was slightly bulging. According to the instructions I needed to top the 'Must' up to 4.54 liters with tepid water. When I removed the lid (along with the air lock bubbler) I noticed there was yeast scum residue on the wall of the bucket (which apparently is healthy) I added the required amount of tepid water and gave the 'Must' a stir with a sterilized, long plastic spoon and replaced the lid and air lock tightly.
 |
| Day 5 - Blackcherry |
I just have to wait for fermentation now . . . . . . . .
Day 6
On checking my fermentation bucket containing the Young's Country Definitive Blackcherry 'Must' visually, I could see that the air lock was still bubbling therefore fermentation was still taking place. I recorded the temperature as usual which was 22°c.
Day 7
According to the instructions, fermentation should stop between 7 ans 20 days (dependent on temp) It appeared the air lock was no longer bubbling however when I lifted the lid there was still tiny bubble activity. I left it to check the next day.
Day 11
I checked the must daily and there was still some fermentation activity present. By Day 11 this had stopped. According to the instructions I should take a hydrometer reading. Having never done this before I sterilised it and placed it in the fermentation bucket with the must . . . . . It hit the bottom. As a last resort (not wanting to look silly) I asked a colleague who suggested I use a trial jar , this made sense once I used it :o) The reading was 1000 and I added the 'wine stabiliser' as directed.
Day 12
I added the 'finings' as instructed and waited to clear. I took another hydrometer reading which was 1006 (to test dryness - sweetness) When I actually tasted it it was still on the 'dry' side for my taste so I added 4 tsp of granulated sugar (dissolved in a drop of warm water)
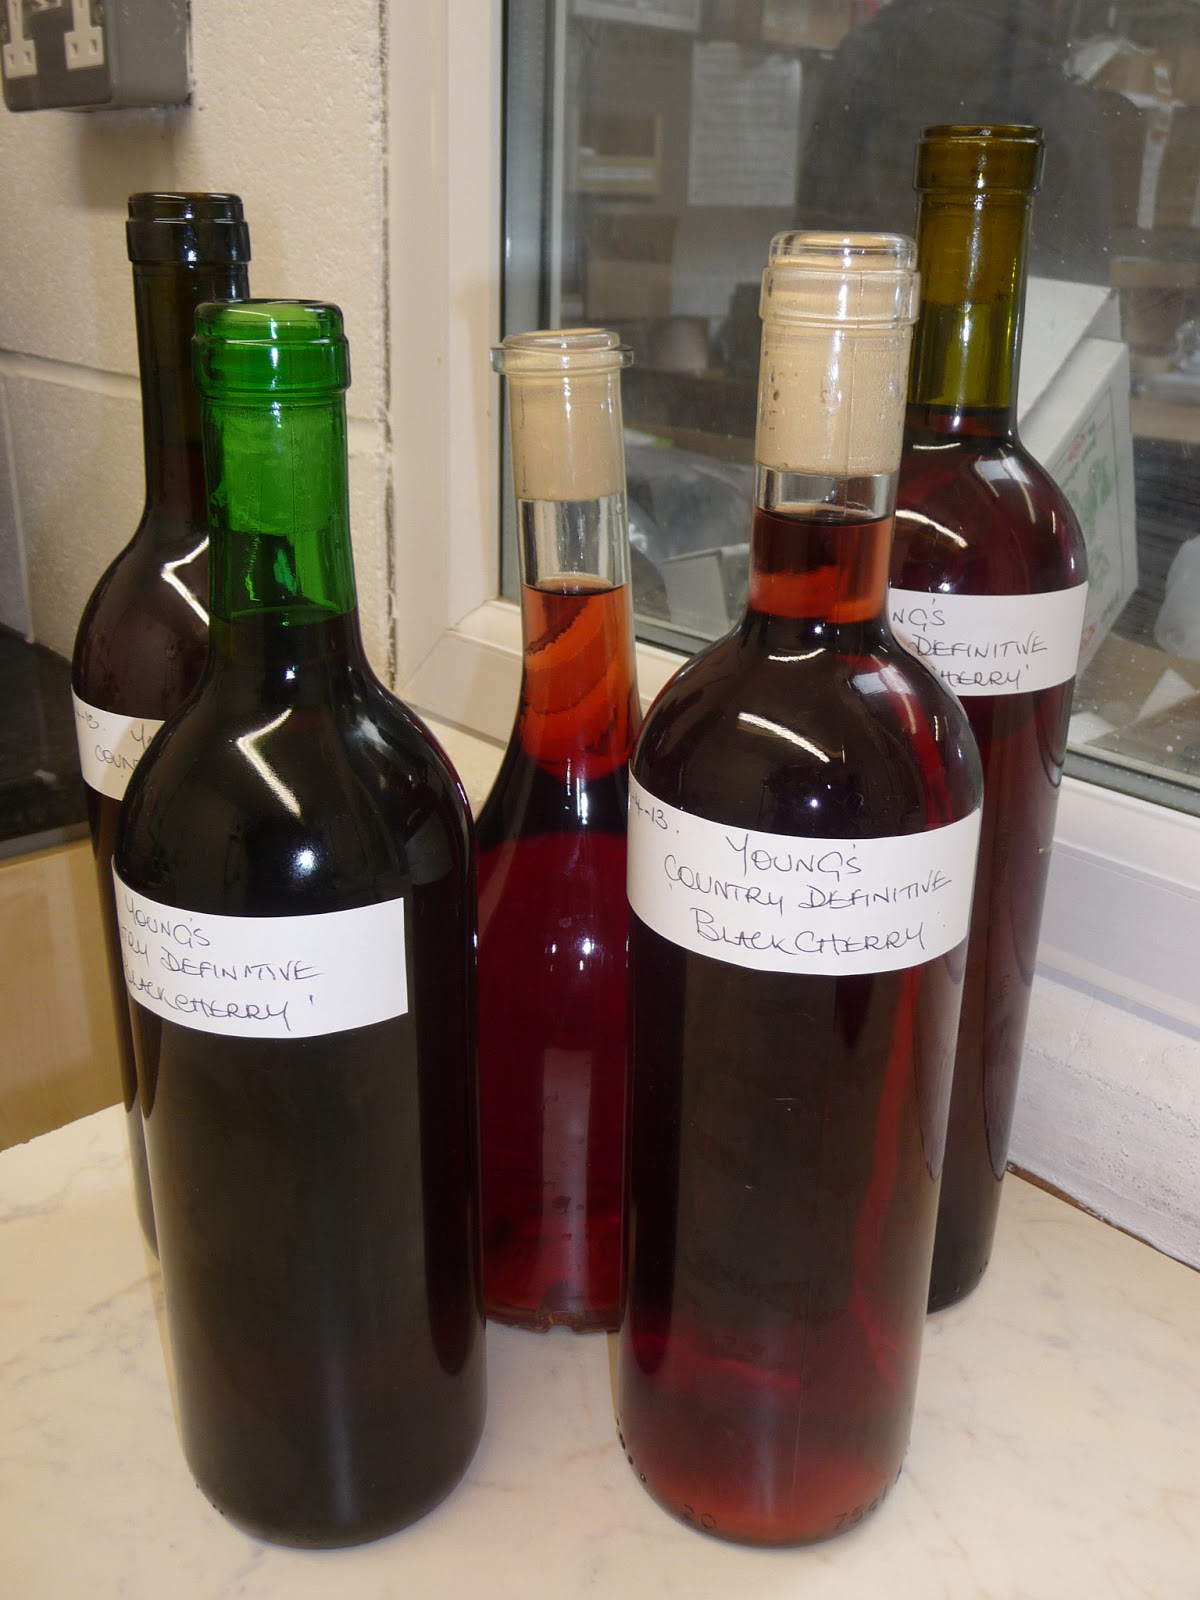
Racking Off
I sterilised a 5lt Plastic Demi John, Plastic Jug, Plastic Funnel, and 6 Wine Bottles.
There appeared to be quite a lot of sediment in the bottom of the fermenting bucket so I used a jug to place the wine in the clean Demi John via a plastic funnel. I also used Filter Vinpapers in the funnel as extra filtration for the sediment. The process was slow but the result was a clear, bright wine! (I changed the Vinpapers a couple of times when filtering slowed)
 |
| Day 12 - Racking Off Using Filter Vinpapers |
Once filtering was complete, I syphoned the wine into bottles. I used a Syphon Clamp to regulate the flow of the wine into the bottles, which was easy to use. I got approx 5.5 bottles of wine from this kit.
I used a 3 Handled Wine Corker to cork the bottles. Simple for one person the use.
 | |||
| Day 12 - Bottling With 3 Handled Corker |
 | ||
| Day 12 - Clear & Bright Young's Blackcherry |
The finished article was very pleasing for a first attempt. All had gone well without major incident . . . considering. I'm yet to taste it, but it looks and smells good :o)
No comments:
Post a Comment